Share article:
Updating confirmed appointments in your calendar [optional but very helpful]
![Image for Updating confirmed appointments in your calendar [optional but very helpful]](https://messagemedia.com/wp-content/uploads/2021/09/Text-confirmations-blog-with-Google-Calenda-blog-header.jpg)
SMS reminders are certain to improve attendance for appointments, especially now that you’ve set up a system through Google calendar. (If not, make sure to check our step-by-step tutorial out.)
Do you want to eliminate even more manual handling? Take your auto-text system one step further by adding customer confirmations. These are automatically handled by the customer and the system you’re about to set up, meaning that all that appears to you in Google calendar is the confirmed event.
Reduce no-shows even further by learning how to encourage customers to manage their own appointments confirmations. Let’s go!
Reading your customers’ replies
So you have now set up an appointment reminder, but what happens when a client replies to confirm their attendance? Well, their reply will appear in your MessageMedia account. You can see the message in your inbox and even set up notifications, in case you’d like an email to let you know they’ve replied.

Setting up your automation in 5 quick steps
But today, we’re going to show you how you can update your Google Calendar appointment automatically. This will allow you (if you choose) to create a set-and-forget reminder system that means you don’t need to check your inbox.
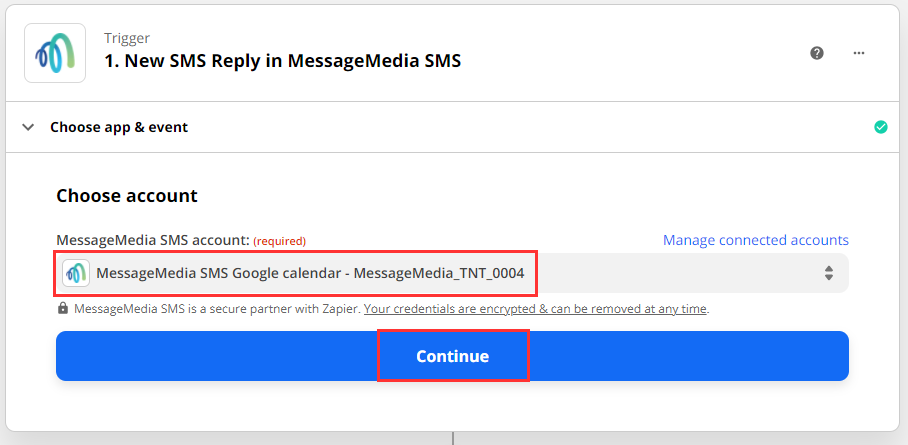
If a client replies ‘C’ or ‘Confirm’, your meeting will change to say ‘Confirmed’ at the beginning and should show up in a new colour, making confirmed appointments immediately recognisable. Like this:
The process is similar to before, where we have prepared a template for you here, but before you click that, you should begin by replying to your original test message. Get your phone now and message back “C” so that Zapier has some test data to ensure everything is connected and working.
On this Zapier template we’ve set up everything already, so you just need to click through the options as before:
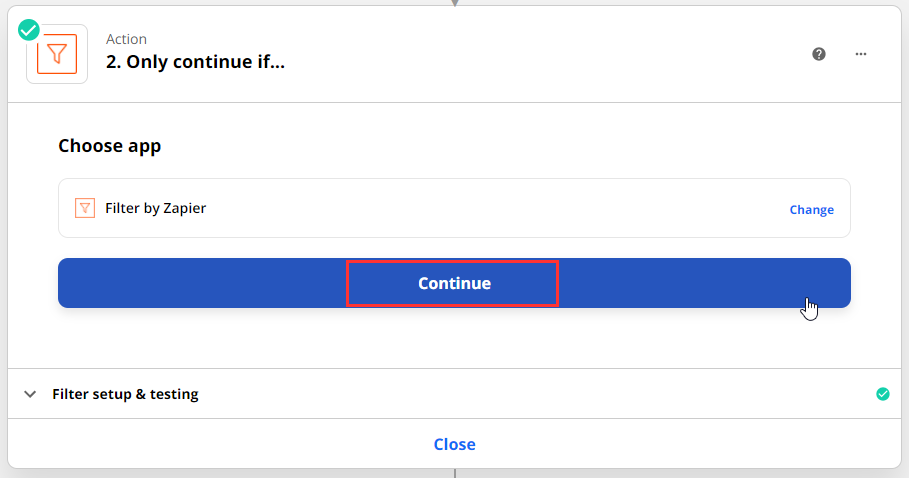
1. Choose your MessageMedia account
This should be the same account you used when setting up your Google calendar automation. Choose the correct account then click continue
2. Test trigger
This step will look for your SMS reply, so make sure you’ve replied ‘C’ or ‘Confirm’ to your appointment reminder on your phone.

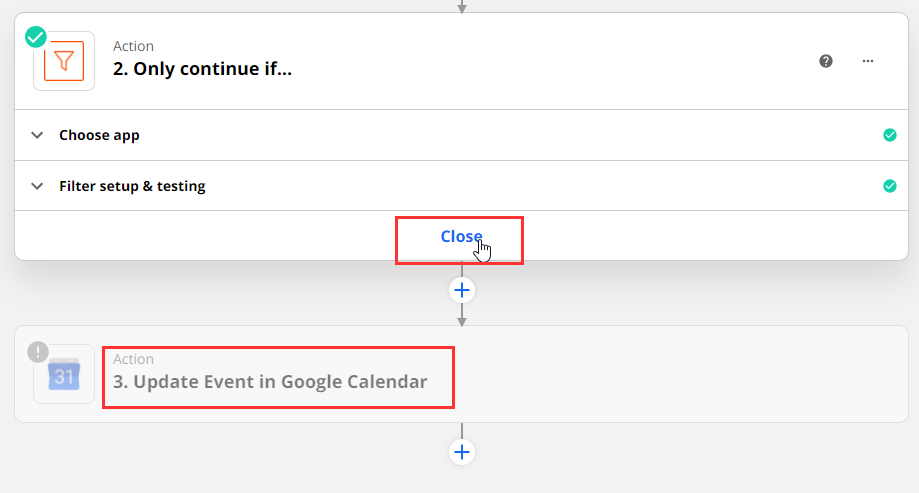
3. Confirm filter
Your filter will make sure your calendar only updates if clients reply “Confirm” or “C”
Click continue
Click continue again, or add other confirmations here, such as “YES” if you want.

Close the filter section and go to the third, final section
4. Choose your Google account
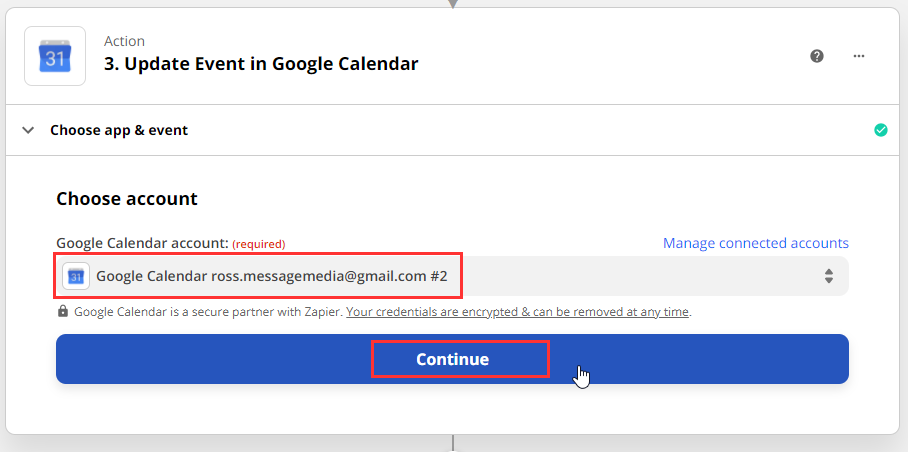
Choose your correct calendar
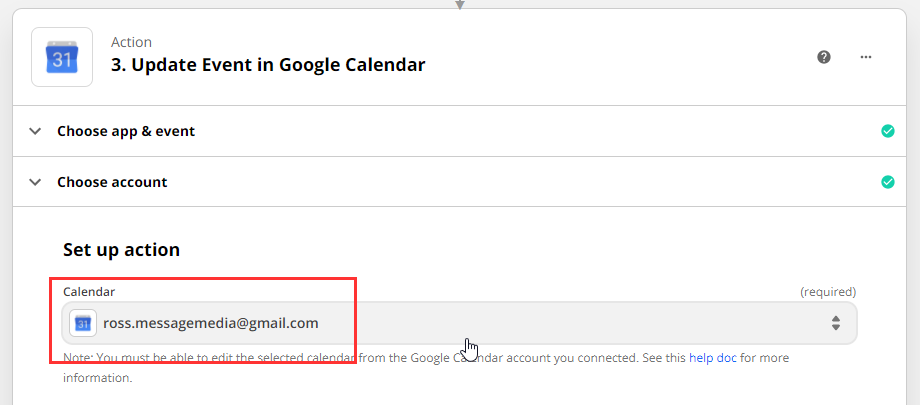
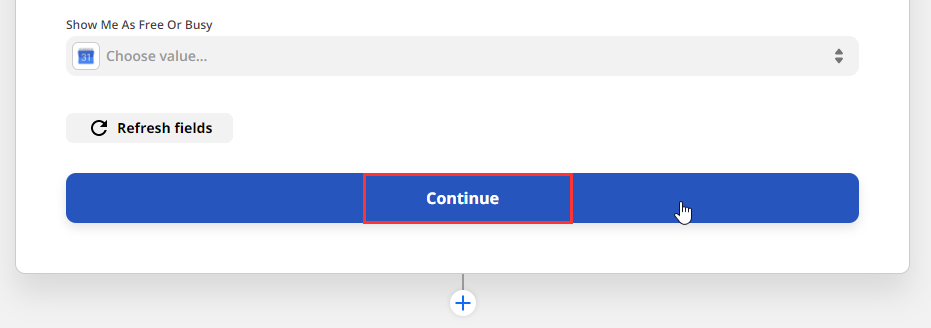
TIP: This section will show you many customisable options. Here, you can get a bit creative and change the way your appointments will look when confirmed, such as customising the colour or changing the appended text.
If you’re happy with our recommended configuration, Scroll to the bottom and click continue
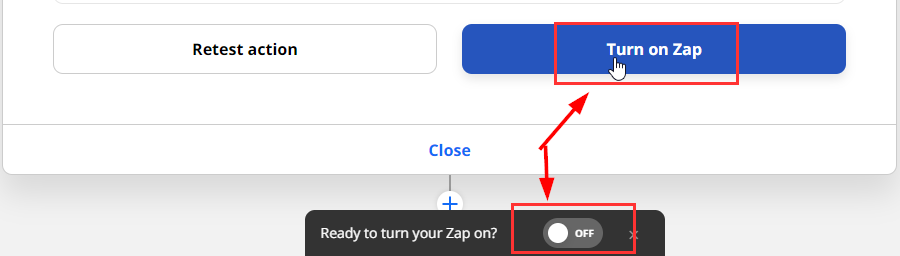
5. Finishing up
After a final test, you’re ready to turn on your Zap!
Final thoughts, further reading
With automatic text reminders and confirmations, your business is set to run even more smoothly. This will help your team focus on what’s really important — customer care and service! Make sure also to check out: