Share article:
A beginner’s guide to creating SMS workflows in HubSpot

As your business grows, how do you keep up with all the tasks on your to-do list? You make automated workflows your friend, that’s how.
By automating key tasks, not only do you free up your team’s time to focus on what matters, but you help build predictable, reliable journeys for your customers. And, if you’re a fan of HubSpot, then its marketing automation tools are a great place to start.
HubSpot’s automated workflows use pre-set rules to trigger a ‘journey’ for your customers. You can set dates or delays for certain actions, and create follow-up actions depending on how a customer engages.
The best bit? Workflows hum away at all hours, even when you’re sleeping, so your customers get the same great level of service – no matter what time of the day or night it is.
Why add SMS to your HubSpot workflows?
Most businesses use workflows to achieve specific goals. Like, nurturing relationships. Engaging with customers. Following up leads fast.
In all of these cases (and many more), SMS is the perfect fit. Not only do 90% of text messages get read within 90 seconds, but SMS also has one of the highest open rates imaginable – a staggering 98%.
Even better, you can combine SMS marketing with other communication channels – all within one automation journey. This can significantly improve the customer experience and generate even greater returns.
Like the sound of 120X ROI and 21% uplift in conversions? Find out how online wine retailer Vinomofo used SMS in HubSpot Workflows to get these great results
Sound good? Here’s how to get started with HubSpot workflows.
First, make sure you’ve added SMS for HubSpot to your HubSpot account.
Then, before you get started, we’ll walk you through some of the basics: workflow type, enrolment triggers, and actions.
1. Workflow type
‘Workflows’ means the type of automation journey you’re creating. In HubSpot, there are two workflows you can add SMS to:
- Contacts.
Based on individual contacts in your CRM, this works across marketing, sales and service. For example, you could send a “Thanks for contacting us” message after a customer completes a form on your website. - Deals.
This relates to the sales hub in HubSpot. It focuses on sales and deals pipeline workflows.
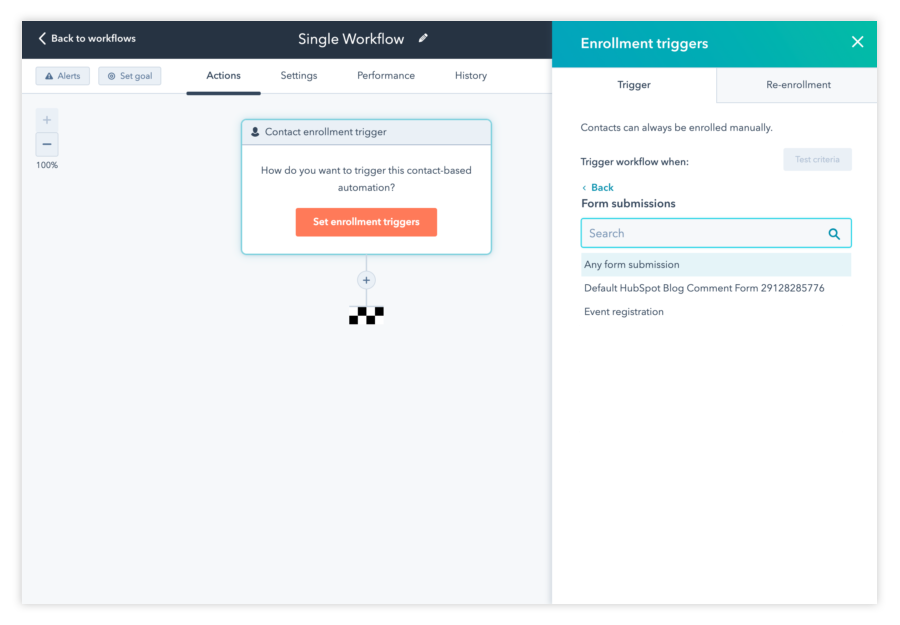
2. Enrolment triggers
An enrolment trigger is an action that kick-starts your workflow. In other words, what needs to happen for your workflow to begin?
It could be a visitor on your website completing a form, or an existing customer reaching a particular stage of their lifecycle.
Learn more about HubSpot enrolment triggers.
3. Actions
Actions are the things that happen once a workflow has kicked off. For example, when your customer or lead enters into a workflow, the first action may be to send an email or an SMS.
Learn more about HubSpot Actions.
Speaking of action, are you ready to go?
Start by creating a single-step workflow
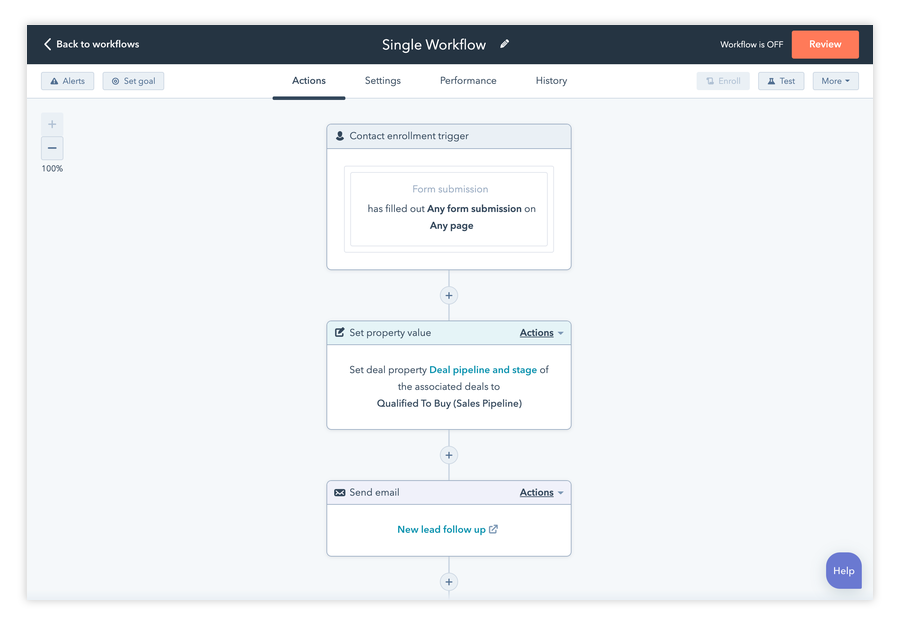
Say someone fills out a form on your website. To automatically flag their query as a deal for your Sales team to follow up, you can create a simple, single-step workflow.
Here are the details:
- Workflow type: Contact-based (not Deal-based as they came through a contact form)
- Enrolment trigger: Form submission
- Action: Assign property value
TOP TIP:
Contact-based workflows can begin in many different ways. The visitor (contact) on your website starts it off by clicking on something like:
- Privacy consent (agreeing to cookies on a website)
- Views on a website page
- Behavioural events, such as whether they did (or didn’t) complete an order on your online store
HubSpot supports a huge range of triggers, which are all explained in this guide to enrolment triggers.
You’ll need to let HubSpot know which form you’re adding the workflow to, and which webpage it’s on. Let’s say, in this case, the registration form appears on all pages of your site; you’d choose the any page option in HubSpot.
You can also tailor actions based on when a form was submitted, by setting specific dates or times.
For example, perhaps there’s a closing date for an offer or free trial. Or maybe you’d like to let people know they’ve reached you outside office hours and there’ll be a small delay before your team reaches out.
Next, it’s time to choose your action.
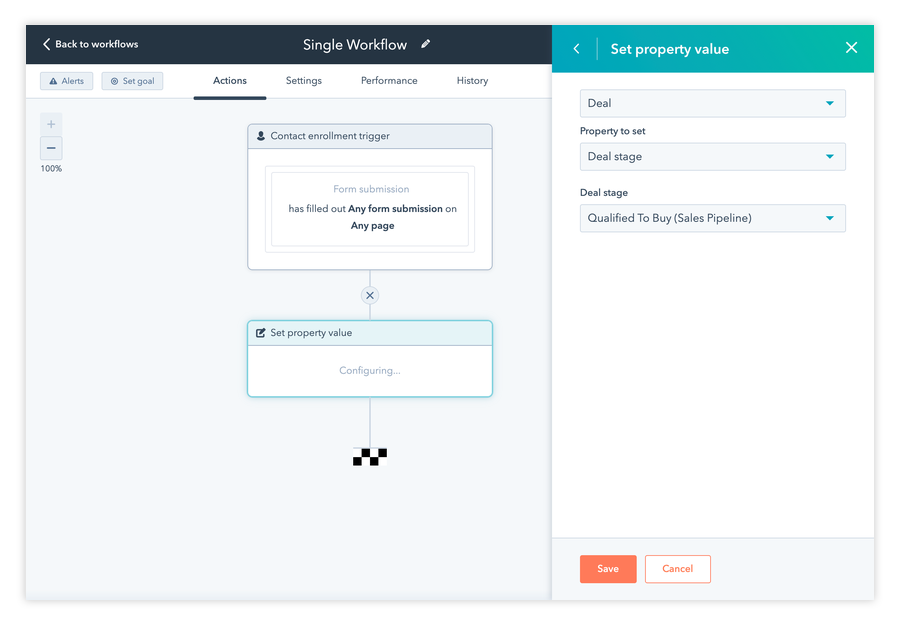
In this case, you’ll want to assign a new Deal property value, rather than Contact property value. This tells HubSpot to change your recent form-filling friend from a Contact to a Deal. The person enters the Deal pipeline for your Sales team to follow up.
Go from single-step to multi-step workflows
Want to add additional steps to a workflow? No problem. Let’s assume your customer has registered their details, and their record has been updated in your CRM. You want to send a message to let the customer know their query was received.
You’ve got a ready-to-go email template that’s perfect for the job. To add this email to the automation journey, you’ll need to create an action to send a follow-up email.
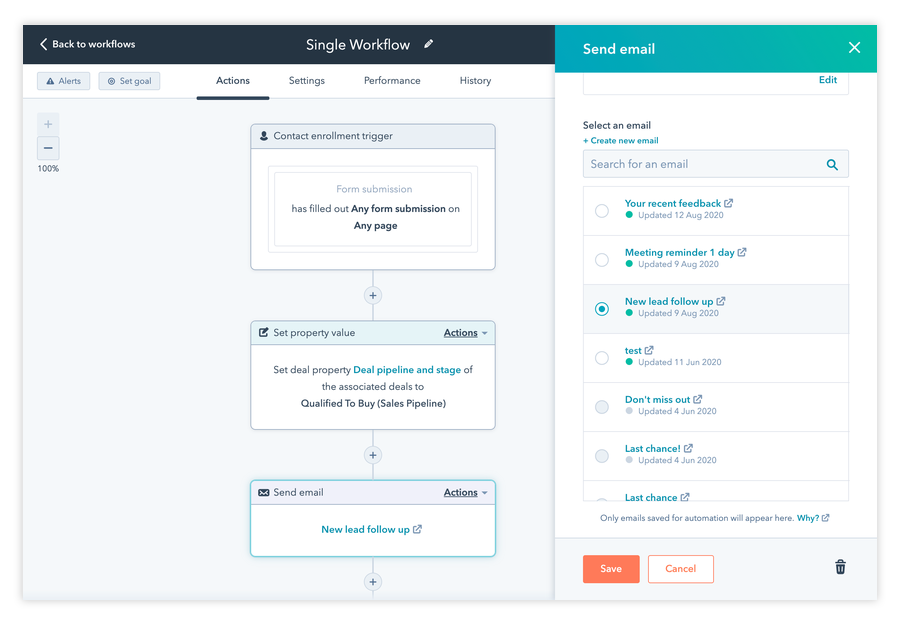
When you add the action, select ‘Send an email’, then choose the email template (if it’s uploaded into the hub) or create a new one from scratch.
TOP TIP:
Learn how to set up automated marketing email templates in HubSpot.
Your multi-step workflow now looks something like this.
Take it to the next level by adding SMS
To make the workflow even more powerful and get through to customers fast, it’s time to add SMS. First, you’ll need an account with MessageMedia. Add our SMS for HubSpot integration to your HubSpot.
Then, you’re ready to add a new action to your workflow: Send SMS.
This could go straight after the ‘Send new email’ action. It’s a great way to ensure customers don’t miss important messages from you.
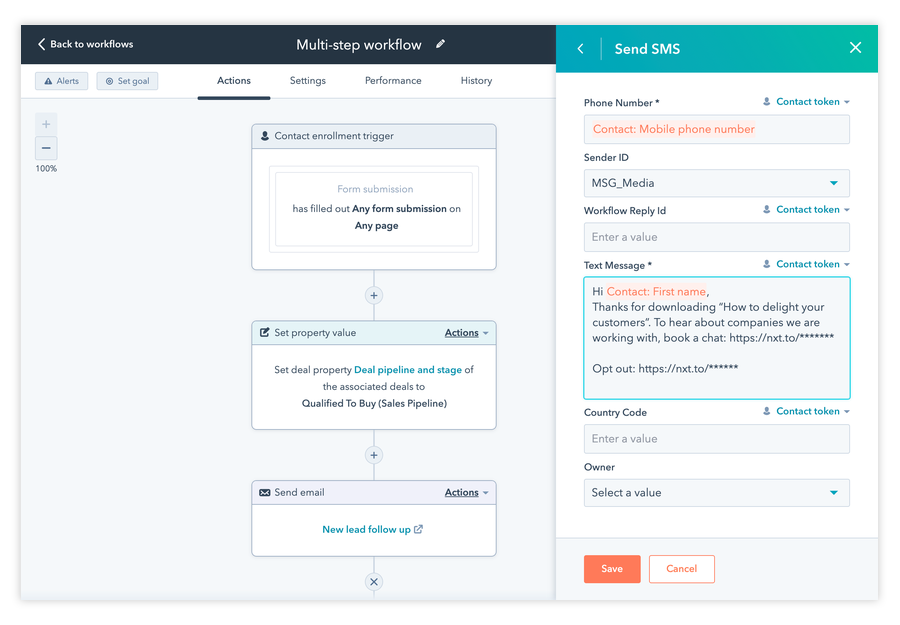
In the ‘Send SMS’ pop-up window, add a contact token for the customer’s phone number by clicking the drop-down on Contact Token (search for mobile phone number).
Then, type in your text message. You can personalize it using the customer’s first name and other info, by using contact token properties.
You can also choose to send from an alpha tag if you’re sending SMS to Australia or the UK. Once approved, the alpha tag will appear at the top of the message, where the phone number normally is. You apply for an alpha tag related to your business name, or similar, so your customers know who the message is from.
If you’re sending SMS to the US or New Zealand, your Sender ID will be your dedicated number or short code (or leave blank if you don’t have one).
Your journey now looks like this.
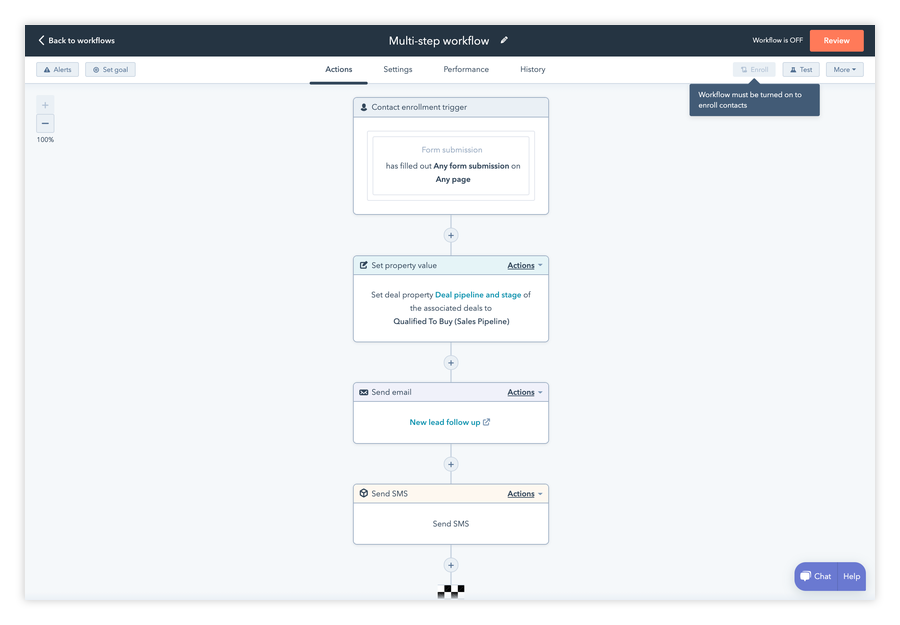
For more information about adding SMS to a HubSpot workflow, read our support article.
More great ways to use SMS in your workflows
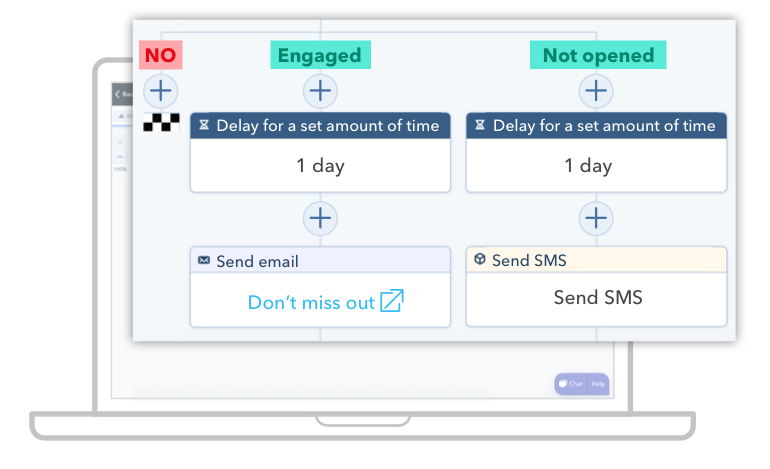
As you can see, adding SMS to your HubSpot workflows is quick and easy. Here are some more ideas for how to put the power of SMS to work in your customer journeys:
- If/Then rules – create a quick rule for when a customer does/doesn’t do something e.g. if they don’t an email, then follow up with a text
- Time delays – send a follow-up text or SMS reminder after a certain amount of time
- Internal notifications – alert internal staff to follow up with a lead quickly
- Marketing campaigns – send a series of automated texts to keep customers in the know about deals or a specific campaign
For more inspiration, check out our eBook on how to increase sales with SMS in HubSpot.
Ready to get started?
To help you hit the ground running, HubSpot is offering free consultations with messaging specialists. Otherwise, dive in by installing SMS for HubSpot today.